Embedding Godot games in iOS apps is easy now
Original URL: https://christianselig.com/2025/05/godot-ios-interop/
Highlights
Recently there’s been very exciting developments in the Godot game engine, that have allowed really easy and powerful integration into an existing normal iOS or Mac app. I couldn’t find a lot of documentation or discussion about this, so I wanted to shine some light on why this is so cool, and how easy it is to do!
What’s Godot?
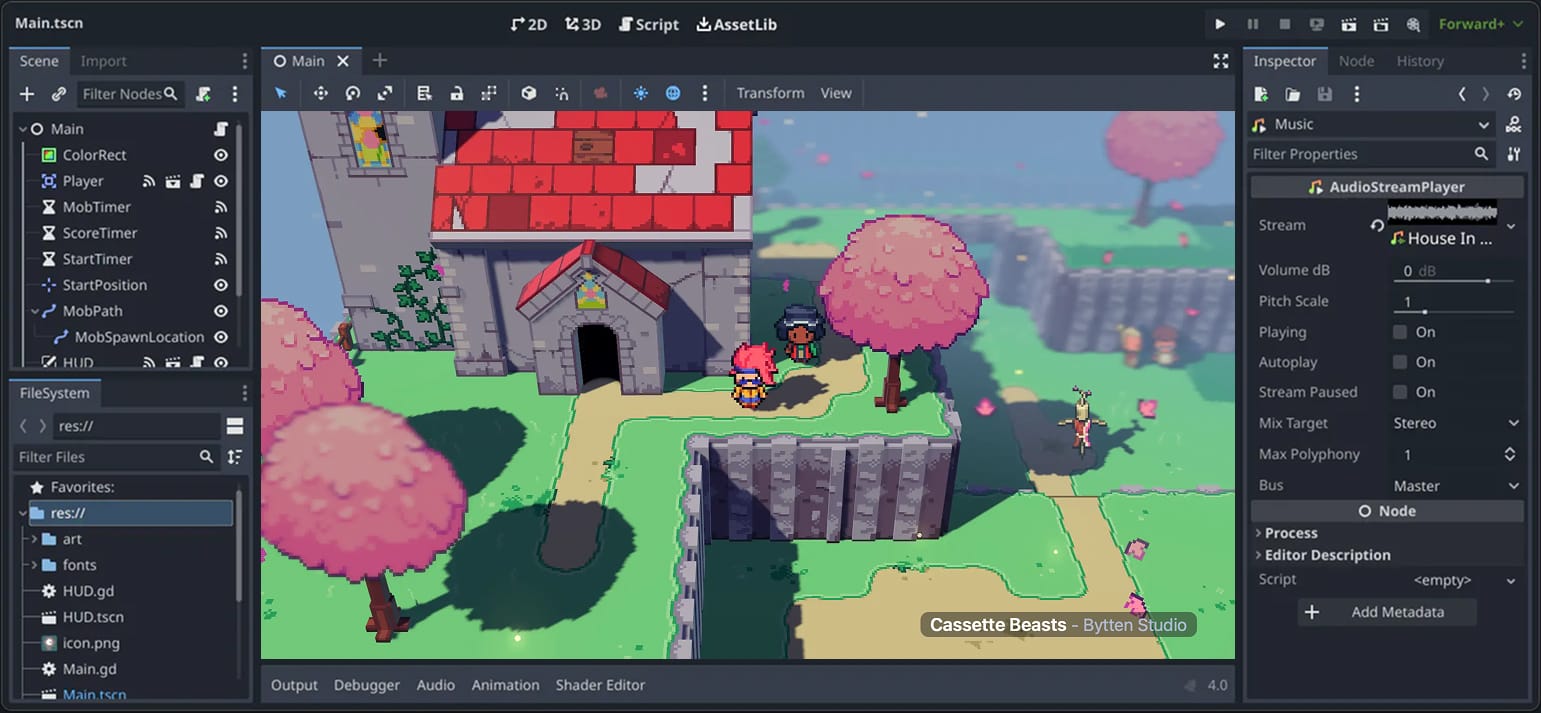
For the uninitiated, Godot is an engine for building games, other common ones you might know of are Unity and Unreal Engine.
It’s risen in popularity a lot over the last couple years due to its open nature: it’s completely open source, MIT licensed, and worked on in the open. But beyond that, it’s also a really well made tool for building games with (both 2D and 3D), with a great UI, beautiful iconography, a ton of tutorials and resources, and as a bonus, it’s very lightweight.
I’ve had a lot of fun playing around with it (considering potentially integrating it into Pixel Pals), and while Unity and Unreal Engine are also phenomenal tools, Godot has felt lightweight and approachable in a really nice way. As an analogy, Godot feels closer to Sketch and Figma whereas Unity and Unreal feel more like Photoshop/Illustrator or other kinda bulky Adobe products.
Even Apple has taken interest in it, contributing a substantial pull request for visionOS support in Godot.
Why use it with iOS?
You’ve always been able to build a game in Godot and export it to run on iOS, but recently thanks to advancements in the engine and work by amazing folks like Miguel de Icaza, you can now embed a Godot game in an existing normal SwiftUI or UIKit app just as you would an extra UITextView or ScrollView.
Why is this important? Say you want to build a game or experience, but you don’t want it to feel just like another port, you want it to integrate nicely with iOS and feel at home there through use of some native frameworks and UI here and there to anchor the experience (share sheets, local notifications, a simple SwiftUI sheet for adding a friend, etc.). Historically your options have been very limited or difficult.
You no longer have to have “a Godot game” or “an iOS app”, you can have the best of both worlds. A fun game built entirely in Godot, while having your share sheets, Settings screens, your paywall, home screen widgets, onboarding, iCloud sync, etc. all in native Swift code. Dynamically choosing which tool you want for the job.
(Again, this was technically possible before and with other engines, but was much, much more complicated. Unity’s in particular seems to have been last updated during the first Obama administration.)
And truly, this doesn’t only benefit “game apps”. Heck, if the user is doing something that will take awhile to complete (uploading a video, etc.) you could give them a small game to play in the interim. Or just for some fun you could embed a little side scroller easter egg in one of your Settings screens to delight spelunking users. Be creative!
SpriteKit?
A quick aside. It wouldn’t be an article about game dev on iOS without mentioning SpriteKit, Apple’s native 2D game framework (Apple also has SceneKit for 3D).
SpriteKit is well done, and actually what I built most of Pixel Pals in. But it has a lot of downsides versus a proper, dedicated game engine:
- Godot has a wealth of tutorials on YouTube and elsewhere, bustling Discord communities for help, where SpriteKit being a lot more niche can be quite hard to find details on
- The obvious one: SpriteKit only works on Apple platforms, so if you want to port your game to Android or Windows you’re probably not going to have a great time, where Godot is fully cross platform
- Godot being a full out game engine has a lot more tools for game development than can be handy, from animation tools, to sprite sheet editors, controls that make experimenting a lot easier, handy tools for creating shaders, and so much more than I could hope to go over in this article. If you ever watch a YouTube video of someone building a game in a full engine, the wealth of tools they have for speeding up development is bonkers.
- Godot is updated frequently by a large team of employees and volunteers, SpriteKit conversely isn’t exactly one of Apple’s most loved frameworks (I don’t think it’s been mentioned at WWDC in years) and kinda feels like something Apple ins’t interested in putting much more work into. Maybe that’s because it does everything Apple wants and is considered “finished” (if so I think that would be incorrect, see previous point for many things that it would be helpful for SpriteKit to have), but if you were to encounter a weird bug I’d feel much better about the likelihood of it getting fixed in Godot than SpriteKit
I’m a big fan of using the right tool for the job. For iOS apps, most of the time that’s building something incredible in SwiftUI and UIKit. But for building a game, be it small or large, using something purpose built to be incredible at that seems like the play to me, and Godot feels like a great candidate there.
Setup
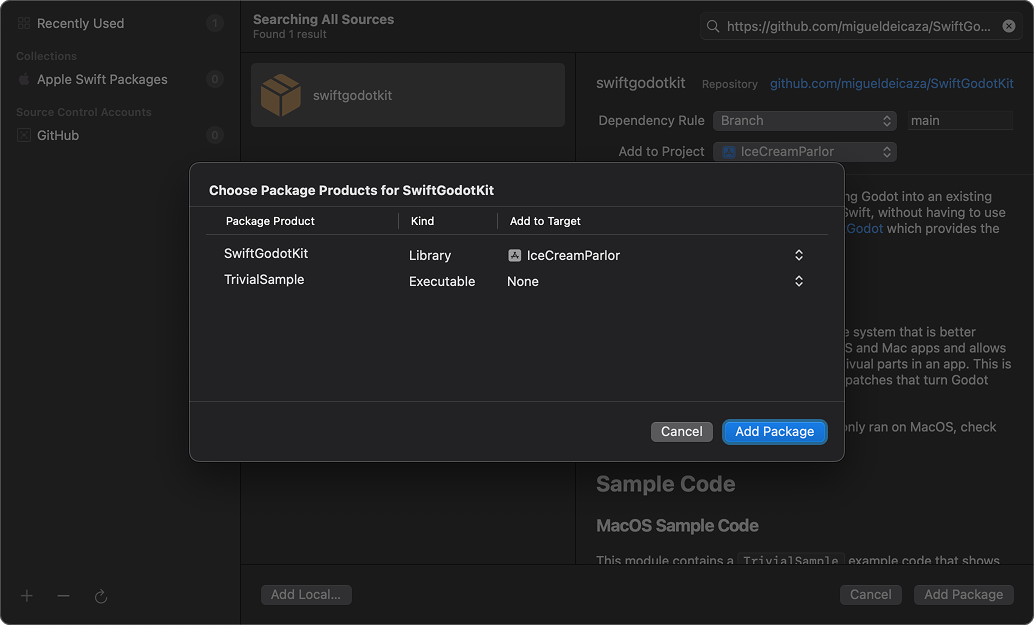
Simply add the SwiftGodotKit package to your Xcode project by selecting your project in the sidebar, ensuring your project is selected in the new sidebar, selecting the Package Dependencies tab, click the +, then paste the GitHub link.
After adding it, you will also need to select the target that you added it to in the sidebar, select the Build Settings tab, then select “Other Linker Flags” and add -lc++.
Lastly, with that same target, under the General tab add MetalFX.framework to Frameworks, Libraries, and Embedded Content. (Yeah you got me, I don’t know why we have to do that.)
After that, you should be able to import SwiftGodotKit.
Usage
Now we’re ready to use Godot in our iOS app! What excites me most and I want to focus on is embedding an existing Godot game in your iOS app and communicating back and forth with it from your iOS app.
This way, you can do the majority of the game development in Godot without even opening Xcode, and then sprinkle in delightful iOS integration by communicating between iOS and Godot where needed.
To start, we’ll build a very simple game called IceCreamParlor, where we select from a list of ice cream options in SwiftUI, which then gets passed into Godot. Godot will have a button the user can tap to send a message back to SwiftUI with the total amount of ice cream. This will not be an impressive “game” by any stretch of the imagination, but should be easy to set up and understand the concepts so you can apply it to an actual game.
To accomplish our communication, in essence we’ll be recreating iOS’ NotificationCenter to send messages back and forth between Godot and iOS, and like NotificationCenter, we’ll create a simple singleton to accomplish this.
Those messages will be sent via Signals. This is Godot’s system for, well, signaling an event occurred, and can be used to signify everything from a button press, to a player taking damage, to a timer ending. Keeping with the NotificationCenter analogy, this would the be Notification that gets posted (except in Godot, it’s used for everything, where in iOS land you really wouldn’t use NotificationCenter for a button press.)
And similar to Notification that has a userInfo field to provide more information about the notification, Godot signals can also take an argument that provides more information. (For example if the notification was “player took damage” the argument might be an integer that includes how much damage they took.) Like userInfo, this is optional however and you can also fire off a signal with no further information, something like “userUnlockedPro” for when they activate Pro after your SwiftUI paywall.
For our simple example, we’re going to send a “selectedIceCream” signal from iOS to Godot, and a “updatedIceCreamCount” signal from Godot to iOS. The former will have a string argument for which ice cream was selected, and the latter will have an integer argument with the updated count.
Setting up our Godot project
Open Godot.app (available to download from their website) and create a new project, I’ll type in IceCreamParlor, choose the Mobile renderer, then click Create.
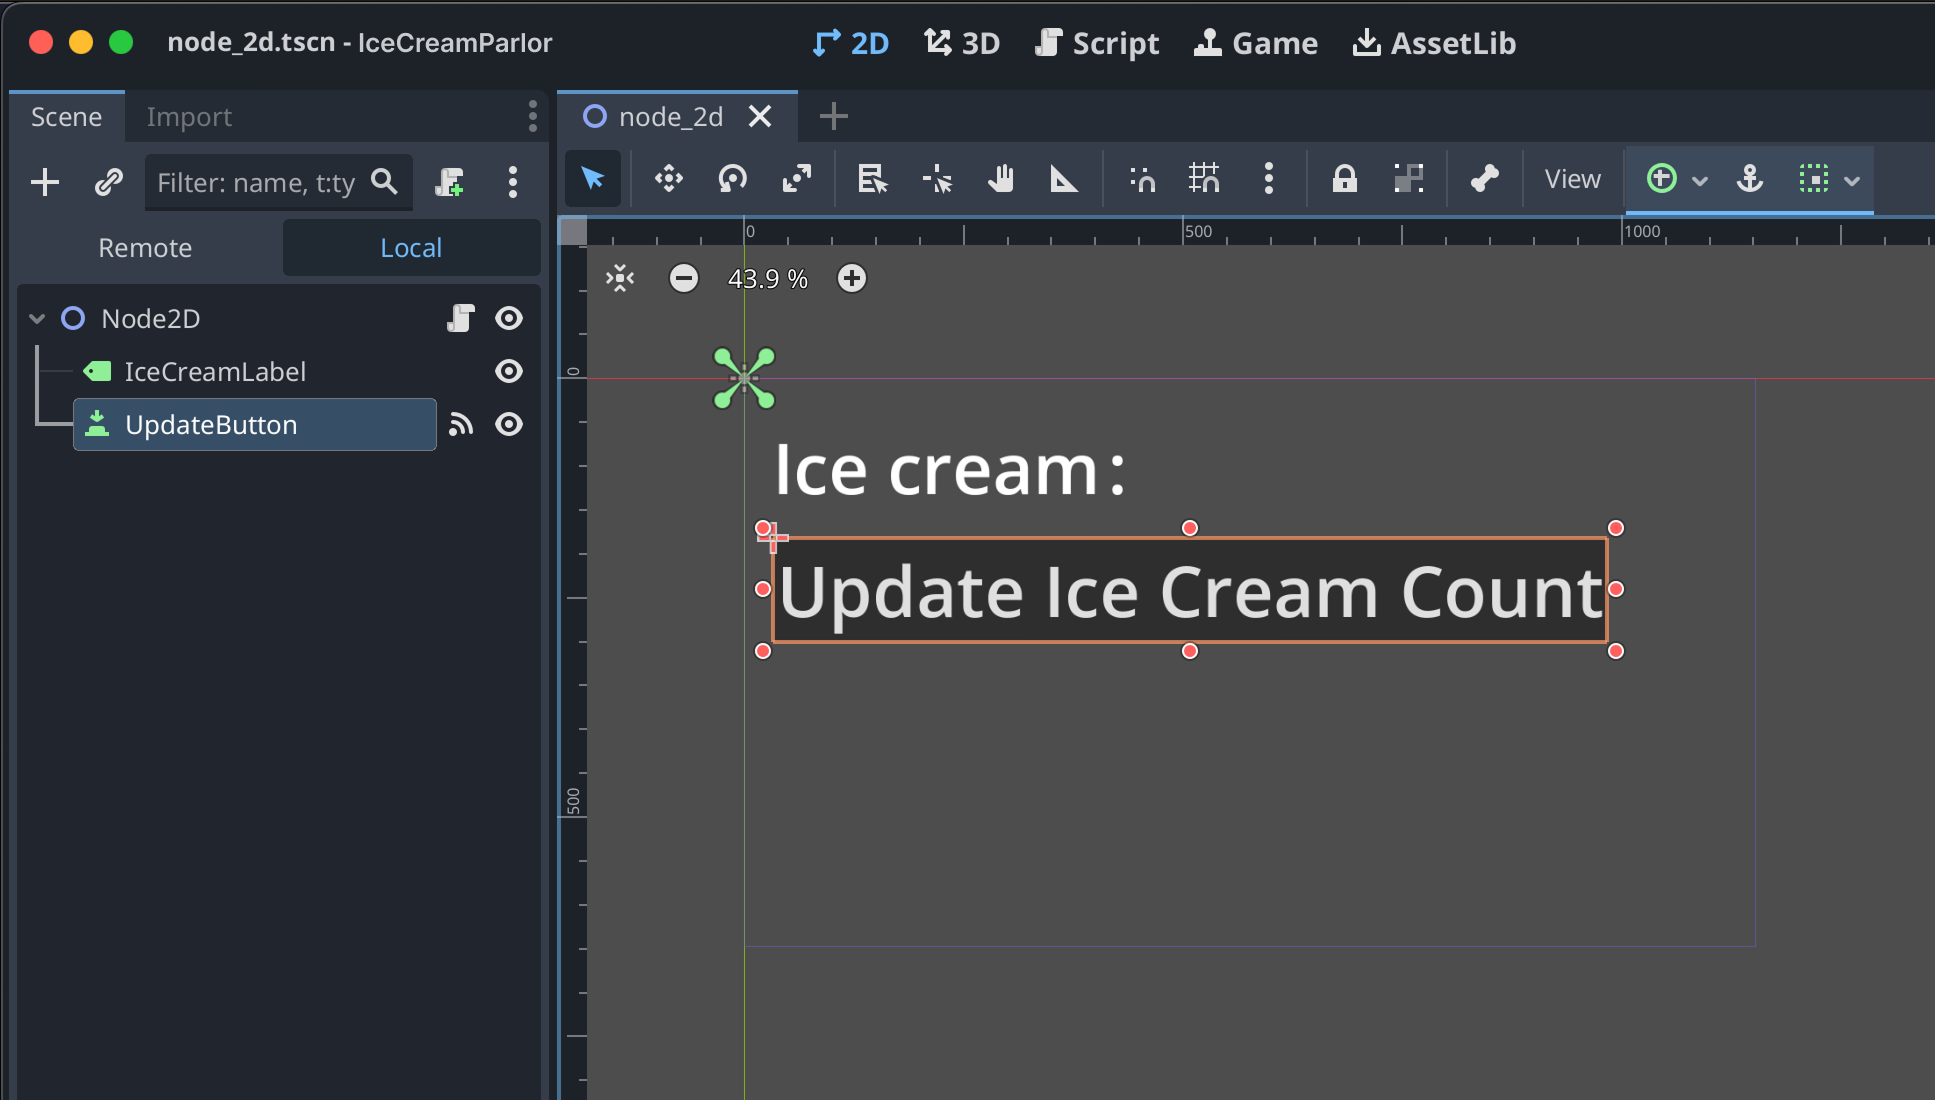
Godot defaults to a 3D scene, so I’ll switch to 2D at the top, and then in the left sidebar click 2D Scene to create that as our root node. I’ll right-click the sidebar to add a child node, and select Label. We’ll set the text to the “Ice cream:”. In the right sidebar, we’ll go to Theme Overrides and increase the font size to 80 to make it more visible, and we’ll also rename it in the left sidebar from Label to IceCreamLabel.
We’ll also do the same to add a Button to the scene, which we’ll call UpdateButton and sets its text to “Update Ice Cream Count”.
If you click the Play button in the top right corner of Godot, it will run and you can click the button, but as of now it doesn’t do anything.
We’ll select our root node (Node2D) in the sidebar, right click, and select “Attach Script”. Leave everything as default, and click Create. This will now present us with an area where we can actually code in GDScript, and we can refer to the objects in our scene by prefixing their name with a dollar sign.
Inside our script, we’ll implement the _ready function, which is essentially Godot’s equivalent of viewDidLoad, and inside we’ll connect to our simple signal we discussed earlier. We’ll do this by grabbing a reference to our singleton, then reference the signal we want, then connect to it by passing a function we want to be called when the signal is received. And of course the function takes a String as a parameter because our signal includes what ice cream was selected.
extends Node2D

var ice_cream: Array[String] = []

func _ready() -> void:

    var singleton = Engine.get_singleton("GodotSwiftMessenger")

    singleton.ice_cream_selected.connect(_on_ice_cream_selected_signal_received)

func _on_ice_cream_selected_signal_received(new_ice_cream: String) -> void:

    # We received a signal! Probably should do something…

    pass
Note that we haven’t actually created the singleton yet, but we will shortly. Also note that normally in Godot, you have to declare custom signals like the ones we’re using, but we’re going to declare them in Swift. As long as they’re declared somewhere, Godot is happy!
Let’s also hook up our button by going back to our scene, selecting our button in the canvas, selecting the “Node” tab in the right sidebar, and double-clicking the pressed() option. We can then select that same Node2D script and name the function _on_update_button_pressed to add a function that executes when the button is pressed (fun fact: the button being pressed event is also powered by signals).
func _on_update_button_pressed() -> void:

    pass
Setting up our iOS/Swift project
Let’s jump over to Xcode and create a new SwiftUI project there as well, also calling it IceCreamParlor. We’ll start by adding the Swift package for SwiftGodotKit to Swift Package Manager, and as mentioned above we’ll add -lc++ to our “Other Linker Flags” under “Build Settings”, add MetalFX, then go to ContentView.swift and add import SwiftGodotKit at the top.
From here, let’s create a simple SwiftUI view so we can choose from some ice cream options.
var body: some View {

    HStack {

        Button {

        } label: {

            Text("Chocolate")

        }


        Button {

        } label: {

            Text("Strawberry")

        }


        Button {

        } label: {

            Text("Vanilla")

        }

    }

    .buttonStyle(.bordered)

}
We’ll also create a new file in Xcode called GodotSwiftMessenger.swift. This will be where we implement our singleton that is akin to NotificationCenter.
We first import SwiftGodot (minus the Kit), essentially because this part is purely about interfacing with Godot through Godot, and doesn’t care about whether or not it’s embedded in an iOS app. For more details on SwiftGodot see its section below.
Then, we annotate our class with the @Godot Swift Macro, which basically just says “Hey make Godot aware that this class exists”. The class is a subclass of Object as everything in Godot needs to inherit from Object, it’s essentially the parent class of everything.
Following that is your bog standard Swift singleton initialization.
Then, with another Swift Macro, we annotate a variable we want to be our signal which signifies that it’s a Signal to Godot. You can either specify its type as Signal or SignalWithArguments<T> depending on whether or not the specific signal also sends any data alongside it. We’ll use that “somethingHappened” signal we mentioned early, which includes a string for more details on what happened.
Note that we used “ice_cream_selected” in Godot but “iceCreamSelected” in Swift, this is because the underscore convention is used in Godot, and SwiftGodotKit will automatically map the camelCase Swift convention to it.
Now we need to tell Godot about this singleton we just made. We want Godot to know about it as soon as possible, otherwise if things aren’t hooked up, Godot might emit a signal that we wouldn’t receive in Swift, or vice-versa.
So, we’ll hook it up very early in our app cycle. In SwiftUI, you might do this in the init of your main App struct as I’ll show below, and in UIKit in applicationDidFinishLaunching.
In addition to the boilerplate code Xcode gives us, we’ve added an extra step to the initializer, where we set a callback on initHookCb. This is just a callback that fires as Godot is setup, and it specifies what level of setup has occurred. We want to wait until the level setup is reached, which means the game is ready to go (you could set it up at an even earlier level if you see that as beneficial).
Then, we just tell Godot about this type by calling register, and then we register the singleton itself with a name we want it to be accessible under.
Again, we want to do this early, as if Godot was already setup in our app, and then we set initHookCb, its contents would never fire and thus we wouldn’t register anything. But don’t worry, this hook won’t fire until we first initialize our Godot game in iOS ourself, so as long as this code is called before then, we’re golden.
Lastly, everything is registered in iOS land, but there’s still nothing that emits or receives signals. Let’s change that by going to ContentView.swift, and change our body to the following:
There’s quite a bit going on here, but let’s break it down because it’s really quite simple.
We have two new state variables, the first is to keep track of the new ice cream count. Could we just do this ourselves purely in SwiftUI? Totally, but for fun we’re going to be totally relying on Godot to keep us updated there, and we’ll just reflect that in SwiftUI to show the communication. Secondly and more importantly, we need to declare a variable for our actual game file so we can embed it.
We do this embedding at the top of the VStack by creating a GodotAppView, a handy SwiftUI view we can now leverage, and we do so by just setting its environment variable to the game we just declared.
Then, we change our buttons to actually emit the selections via signals, and when the view appears, we make sure we connect to the signal that keeps us updated on the count so we can reflect that in the UI. Note that we don’t also connect to the iceCreamSelected signal, because we don’t care to receive it in SwiftUI, we’re just firing that one off for Godot to handle.
Communicating
Let’s update our gdscript in Godot to take advantage of these changes.
func _on_ice_cream_selected_signal_received(new_ice_cream: String) -> void:

    ice_cream.append(new_ice_cream)

    $IceCreamLabel.text = "Ice creams: " + ", ".join(ice_cream)

func _on_update_button_pressed() -> void:

    var singleton = Engine.get_singleton("GodotSwiftMessenger")

    singleton.ice_cream_count_updated.emit(ice_cream.size())
Not too bad! We now receive the signal from SwiftUI and update our UI and internal state in Godot accordingly, as well as the UI by making our ice cream into a comma separated list. And then when the user taps the update button, we then send (emit) that signal back to SwiftUI with the updated count.
Running
To actually see this live, first make sure you have an actual iOS device plugged in. Unfortunately Godot doesn’t work with the iOS simulator.
Secondly, in Godot, select the Project menu bar item, then Export, then click the Add button and select “iOS”. This will bring you to a screen with a bunch of options, but my understanding is that this is 99% if you’re building your app entirely in Godot, you can plug in all the things you’d otherwise plug into Xcode here instead, and Godot will handle them for you. That doesn’t apply to us, we’re going to do all that normally in Xcode anyway, we just want the game files, so ignore all that and select “Export PCK/ZIP…” at the bottom. It’ll ask you where you want to save it, and I just keep it in the Godot project directory, make sure “Godot Project Pack (*.pck)” is selected in the dropdown, and then save it as main.pck.

That’s our “game” bundled up, as meager as it is!
We’ll then drop that into Xcode, making sure to add it to our target, then we can run it on the device!
Here we’ll see choosing the ice cream flavor at the bottom in SwiftUI beams it into the Godot game that’s just chilling like a SwiftUI view, and then we can tap the update button in Godot land to beam the new count right back to SwiftUI to be displayed.
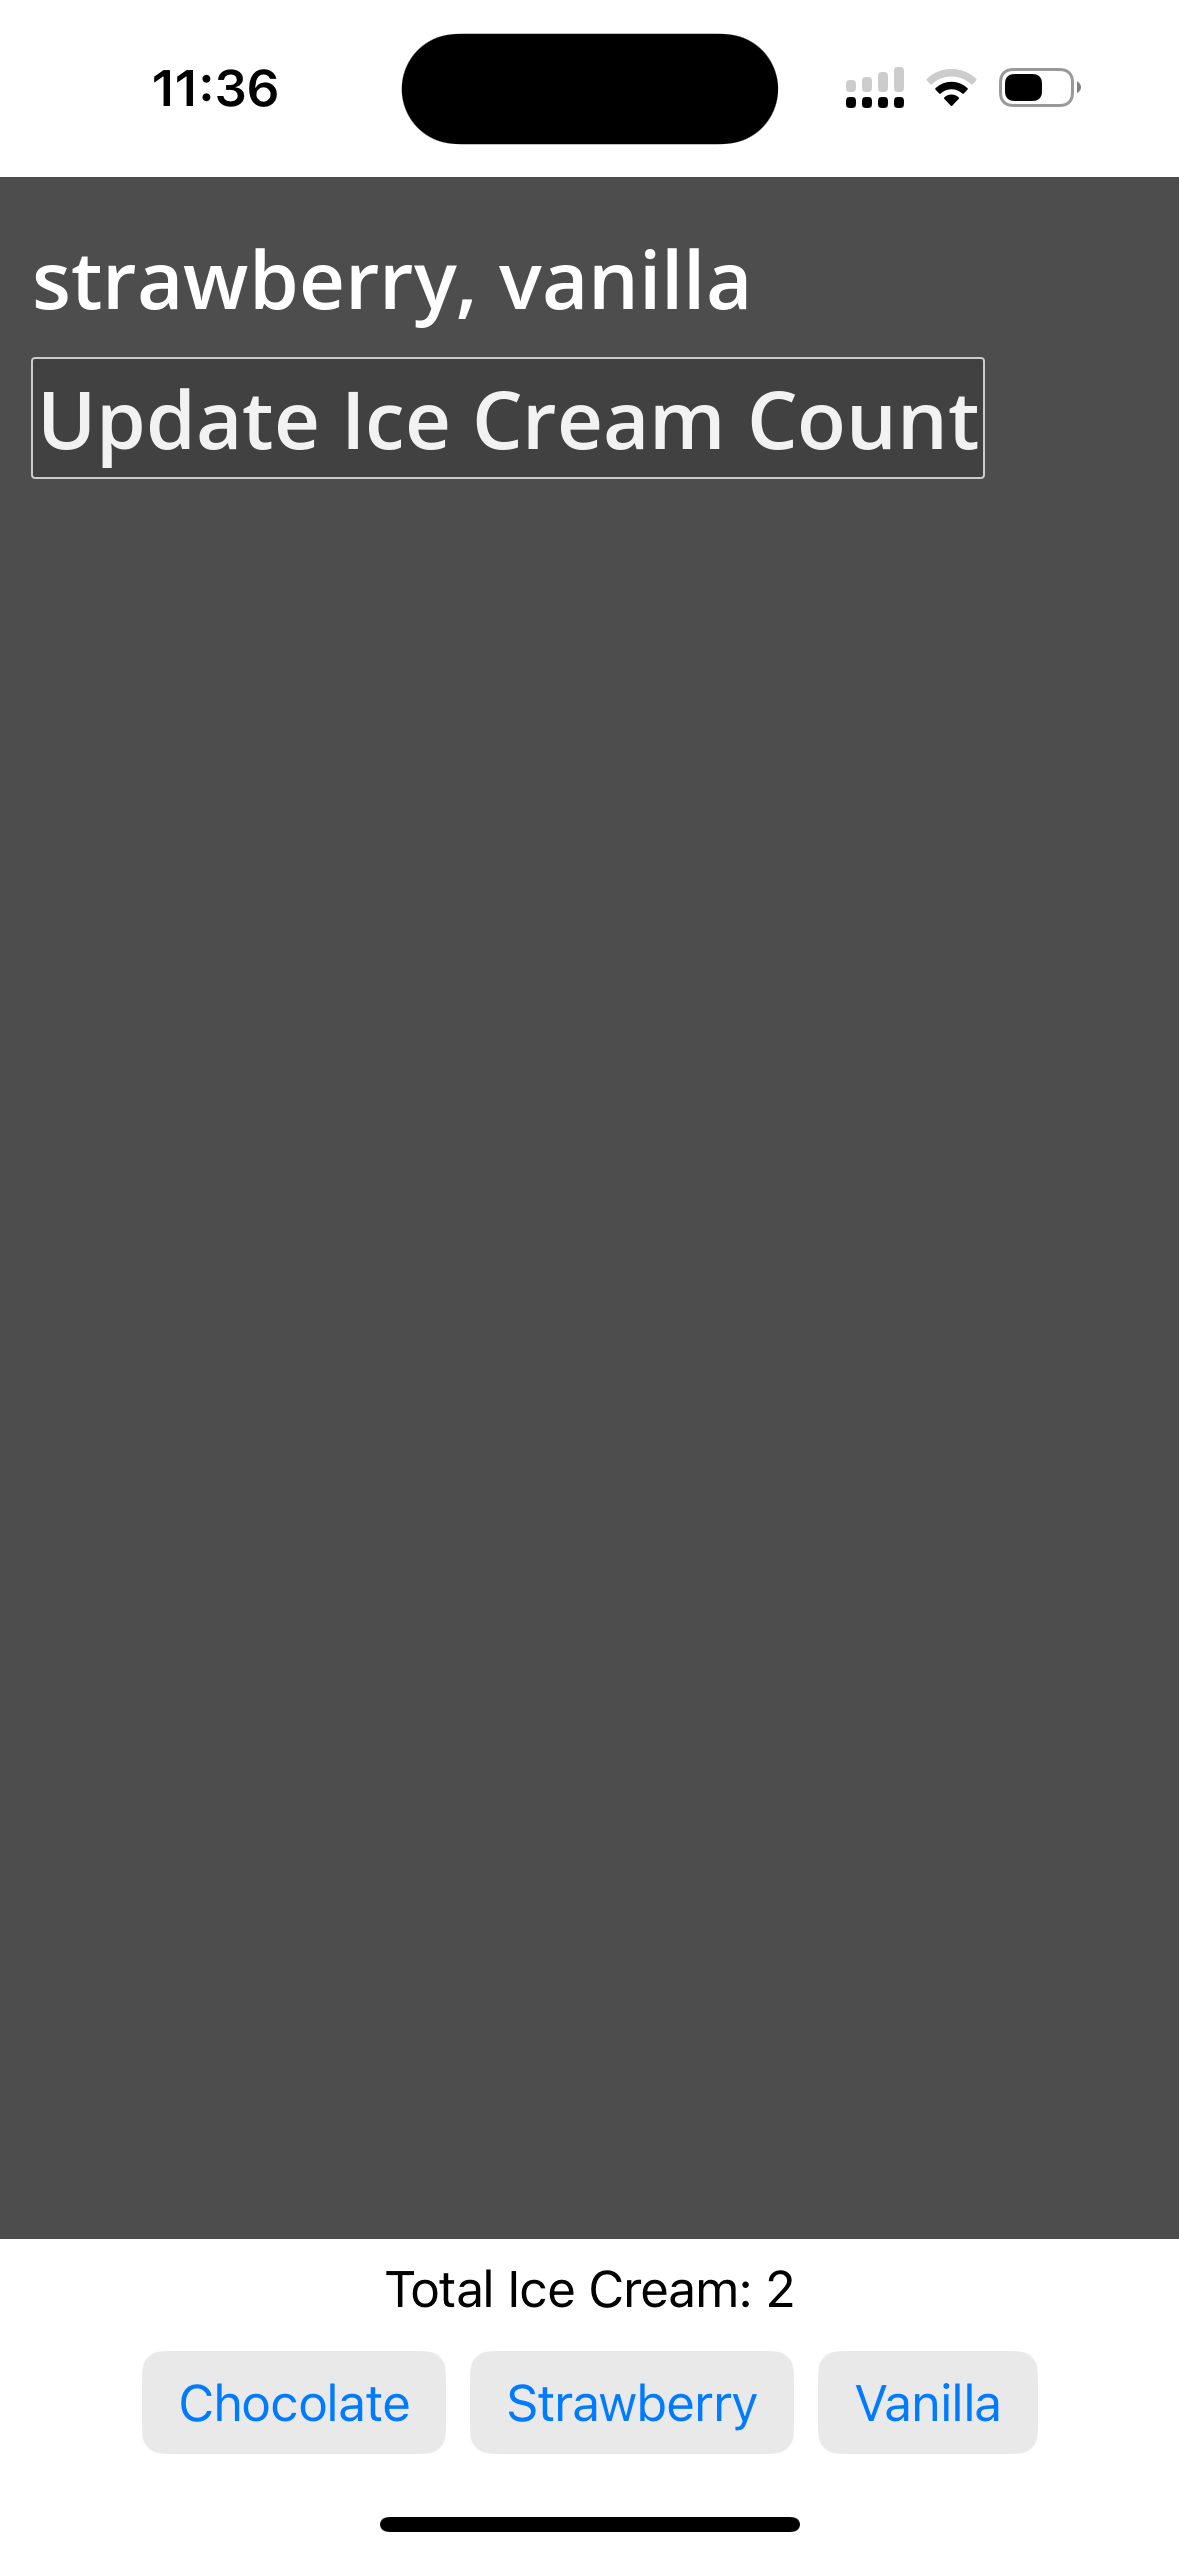
Not exactly a AAA game but enough to show the basics of communication 😄
Look at you go! Take this as a leaping off point for all the cool SwiftUI and Godot interoperability that you can accomplish, be it tappings a Settings icon in Godot to bring up a beautifully designed, native SwiftUI settings screen, or confirmation to you your game when the user updated to the Pro version of your game through your SwiftUI paywall.
Bonus: SwiftGodot (minus the “Kit”)
An additional fun option (that sits at the heart of SwiftGodotKit) is SwiftGodot, which allows you to actually build your entire Godot game with Swift as the programming language if you so choose. Swift for iOS apps, Swift on the server, Swift for game dev. Swift truly is everywhere.
For me, I’m liking playing around in GDScript, which is Godot’s native programming language, but it’s a really cool option to know about.
Embed size
A fear might be that embedding Godot into your app might bloat the binary and result in an enormous app download size. Godot is very lightweight, adding it to your codebase adds a relatively meager (at least by 2025 standards) 30MB to your binary size. That’s a lot larger than SpriteKit’s 0MB, but for all the benefits Godot offers that’s a pretty compelling trade.
(30MB was measured by handy blog sponsor, Emerge Tools.)
Tips
Logging
If you log something in Godot/GDScript via print("something") that will also print to the Xcode console, handy!
Quickly embedding the pck into iOS
Exporting the pck file from Godot to Xcode is quite a few clicks, so if you’re doing it a lot it would be nice to speed that up. We can use the command line to make this a lot nicer.
Godot.app also has a headless mode you can use by going inside the.app file, then Contents > MacOS > Godot. But typing the full path to that binary is no fun, so let’s symlink the binary to /usr/local/bin.
sudo ln -s "/Applications/Godot.app/Contents/MacOS/Godot" /usr/local/bin/godot
Now we can simply type godot anywhere in the Terminal to either open the Godot app, or we can use godot --headless for some command line goodness.
My favorite way to do this, is to do something like the following within your Godot project directory:
godot --headless --export-pack "iOS" /path/to/xcodeproject/target/main.pck
This will handily export the pck and add it to our Xcode project, overwriting any existing pck file, from which point we can simply compile our iOS app.
Wrapping it up
I really think Godot’s new interoperability with iOS is an incredibly exciting avenue for building games on iOS, be it a full fledged game or a small little easter egg integrated into an existing iOS app, and hats off to all the folks who did the hard work getting it working.
Hopefully this serves as an easy way to get things up and running! It might seem like a lot at first glance, but most of the code shown above is just boilerplate to get an example Godot and iOS project up and running, the actual work to embed a game and communicate across them is so delightfully simple!
(Also big shout out to Chris Backas and Miguel de Icaza for help getting this tutorial off the ground.)